Prep Time: 15 minutes
Cooking Time: 45–50 minutes
Rising Time: 12–18 hours
Cooling Time: 30 minutes
Total Time: About 13–19 hours
Yield: 1 large loaf
Servings: 10–12 slices
Difficulty: Easy
Rustic No-Knead Rosemary Garlic Bread
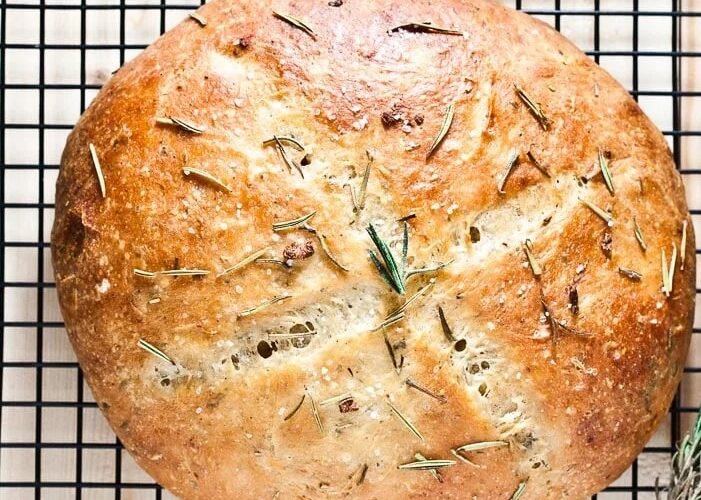
This rustic no-knead rosemary garlic bread has a crisp, golden crust, a soft and chewy interior, and plenty of savory garlic and fresh rosemary flavor. The long fermentation does all the hard work, developing a wonderfully flavorful loaf without kneading.
A Dutch oven helps trap steam during baking, creating the crusty exterior traditionally associated with artisan bread. Serve it warm alongside soup, pasta, roasted meats, or simply with butter and olive oil.
Ingredients
- 420 g all-purpose or bread flour
- 330 ml lukewarm water
- 1½ teaspoons fine sea salt
- 1 teaspoon instant yeast
- 3 cloves garlic, finely minced
- 1½ tablespoons fresh rosemary, finely chopped
- 1 tablespoon olive oil
- Extra flour, for shaping
Instructions
1. Mix the Dough
Add the flour, salt, instant yeast, minced garlic, and chopped rosemary to a large mixing bowl.
Stir to distribute the ingredients evenly.
Add the water and olive oil.
Using a wooden spoon or spatula, mix until a rough, sticky dough forms and no dry flour remains.
Do not knead the dough.
2. Cover and Let Rise
Cover the bowl tightly with plastic wrap or a lid.
Leave the dough at room temperature for 12–18 hours.
The dough should become noticeably larger, bubbly, and airy.
A longer fermentation develops more flavor, while a warmer kitchen will shorten the rising time.
3. Shape the Dough
Lightly flour your work surface.
Scrape the dough onto the surface. It will be sticky and soft, which is normal.
Using lightly floured hands, gently shape the dough into a round loaf.
Avoid aggressively pressing the dough because you want to preserve the air bubbles created during fermentation.
Place the dough on a sheet of parchment paper and lightly dust the top with flour.
Cover loosely and allow it to rest for 30 minutes while the oven heats.
4. Preheat the Dutch Oven
Place a large Dutch oven with its lid inside the oven.
Preheat to 230°C / 450°F for at least 30 minutes.
A thoroughly heated Dutch oven is important for achieving a crisp crust and good oven spring.
5. Score the Bread
Using a sharp knife or bread lame, make one deep slash across the top of the dough.
The cut allows the bread to expand in a controlled way during baking.
Carefully lift the dough using the parchment paper and place it into the hot Dutch oven.
6. Bake
Cover the Dutch oven with its lid.
Bake at 230°C / 450°F for 30 minutes.
Remove the lid and continue baking for another 15–20 minutes, until the bread is deeply golden brown and crusty.
For an especially crisp crust, leave the loaf uncovered for the final few minutes.
7. Cool
Carefully remove the bread from the Dutch oven.
Transfer it to a wire rack and allow it to cool for at least 30 minutes before slicing.
For the best crumb, resist cutting into the loaf while it is still very hot.
Nutrition Information
Estimated per slice, based on 12 slices:
- Calories: 175 kcal
- Protein: 5 g
- Carbohydrates: 31 g
- Fat: 4 g
- Saturated Fat: 0.6 g
- Fiber: 1.5 g
- Sugar: 0.5 g
- Sodium: 290 mg
Nutrition information is approximate and will vary depending on flour, portion size, and ingredient brands.
Baker’s Tips
- Do not knead: The long fermentation develops gluten and flavor naturally.
- Keep the dough sticky: Adding too much flour can make the finished bread dense.
- Use fresh rosemary: Fresh rosemary provides a brighter flavor than dried herbs.
- Finely mince the garlic: This distributes the garlic flavor throughout the loaf.
- Preheat the Dutch oven thoroughly: A hot baking vessel creates excellent oven spring.
- Cool before slicing: This allows the crumb to finish setting.
- If your kitchen is very warm, check the dough earlier because fermentation will happen faster.
Flavor Variations
Parmesan Rosemary Garlic Bread
Add 50 g finely grated Parmesan cheese to the dough before the first rise.
Cheesy Garlic Bread
Fold 100 g shredded mozzarella or cheddar into the dough just before shaping.
Garlic Butter Finish
Brush the hot loaf with melted butter mixed with minced garlic and chopped rosemary immediately after baking.
Roasted Garlic Bread
Replace the fresh minced garlic with 3–4 roasted garlic cloves, mashed into a paste before adding them to the dough.
Herb Bread
Add a mixture of rosemary, thyme, and parsley for a more complex herbal flavor.
Storage
Once completely cooled, store the bread in a paper bag or bread bag at room temperature for up to 3 days.
For longer storage, slice the loaf and freeze it in an airtight freezer-safe bag for up to 3 months.
Toast frozen slices directly in a toaster or allow them to thaw at room temperature.
Avoid refrigerating the bread because refrigeration can cause it to stale more quickly.
Serving Suggestions
This rustic bread is excellent served with:
- Salted butter
- Extra-virgin olive oil
- Balsamic vinegar
- Tomato soup
- Creamy soups
- Pasta dishes
- Roasted chicken
- Grilled vegetables
- Cheese and charcuterie
- Eggs and avocado
For an irresistible appetizer, slice the bread, brush it with garlic butter, and toast until golden.
Quick Recipe Summary
Mix: 15 minutes
Rise: 12–18 hours
Shape & rest: 30 minutes
Preheat: 30 minutes
Bake covered: 30 minutes at 230°C / 450°F
Bake uncovered: 15–20 minutes
Cool: 30 minutes
Best result: A beautifully rustic loaf with a crackly golden crust, chewy interior, aromatic rosemary, and rich garlic flavor—without any kneading.
