Prep Time: 30 minutes
Cooking Time: 45 minutes
Fermentation & Proofing: 10–14 hours
Total Time: About 11–15 hours
Yield: 1 large loaf
Servings: 10–12 slices
Difficulty: Intermediate
Classic Homemade Sourdough Bread
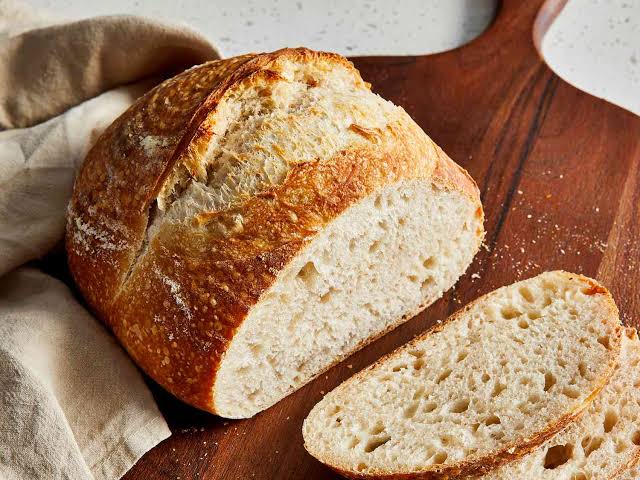
This classic sourdough bread has a crisp, golden crust and a soft, chewy interior with a pleasantly tangy flavor. The recipe uses an active sourdough starter instead of commercial yeast, allowing natural fermentation to develop the bread’s characteristic flavor and texture.
For the best results, use a healthy, active starter that has been fed recently and is bubbly and capable of doubling in volume.
Ingredients
- 500 g bread flour
- 350 g water, lukewarm
- 100 g active sourdough starter
- 10 g fine sea salt
- Extra flour or rice flour, for shaping
Instructions
1. Mix the Dough
In a large mixing bowl, combine the water and active sourdough starter. Stir until the starter is mostly dissolved.
Add the bread flour and mix until no dry flour remains. Cover the bowl and let the dough rest for 30 minutes.
2. Add the Salt
Sprinkle the salt over the dough. Wet your hands and gently squeeze and fold the dough until the salt is evenly incorporated.
The dough will initially feel sticky and loose. This is normal.
3. Bulk Fermentation
Cover the bowl and leave the dough at room temperature for approximately 4–6 hours.
During the first 2 hours, perform a series of stretch-and-folds every 30 minutes:
- Wet your hand.
- Grab one side of the dough.
- Stretch it upward gently.
- Fold it over the center.
- Rotate the bowl and repeat 3–4 times.
After several rounds, the dough should become smoother, stronger, and more elastic.
Bulk fermentation is complete when the dough has visibly expanded, feels airy, and shows bubbles around the edges.
4. Shape the Loaf
Lightly flour your work surface and gently turn out the dough.
Shape it into a loose round, then allow it to rest uncovered for approximately 15–20 minutes.
Shape the dough more tightly into a round loaf by folding the edges toward the center and creating surface tension.
Place the shaped dough seam-side up in a well-floured banneton or bowl lined with a clean kitchen towel.
5. Final Proof
Cover the dough and refrigerate for 8–12 hours, preferably overnight.
Cold proofing develops flavor and makes the dough easier to score and handle.
6. Preheat the Oven
Place a Dutch oven with its lid inside the oven.
Preheat to 240°C / 465°F for at least 30–45 minutes.
A thoroughly heated Dutch oven helps create the steam necessary for a crisp crust and good oven spring.
7. Score the Dough
Carefully turn the cold dough onto a sheet of parchment paper.
Dust lightly with flour if desired. Using a sharp bread lame or razor blade, make one deep slash across the top of the loaf.
Work quickly so the dough does not warm too much.
8. Bake
Carefully place the dough into the hot Dutch oven.
Cover with the lid and bake at 240°C / 465°F for 20 minutes.
Remove the lid, reduce the temperature to 220°C / 425°F, and bake for another 20–25 minutes, or until the crust is deeply golden brown.
9. Cool Completely
Remove the bread from the Dutch oven and place it on a wire rack.
Allow it to cool for at least 1–2 hours before slicing.
Although it may be tempting to cut into the loaf immediately, cooling allows the interior crumb to finish setting. Cutting too early can result in a gummy texture.
Nutrition Information
Estimated per slice, based on 12 slices:
- Calories: 180 kcal
- Protein: 6 g
- Carbohydrates: 35 g
- Fat: 1 g
- Saturated Fat: 0.2 g
- Fiber: 2 g
- Sugar: 0.2 g
- Sodium: 320 mg
Nutrition values are estimates and will vary according to flour, starter, slice size, and other ingredients.
Baker’s Tips
- Use an active starter: Your starter should be bubbly, fragrant, and recently fed.
- Watch the dough, not just the clock: Fermentation speed changes with room temperature and starter activity.
- Avoid adding excessive flour: A slightly sticky dough generally produces a lighter loaf.
- Build dough strength: Stretch-and-folds help create structure and elasticity.
- Cold-proof overnight: Refrigeration makes shaping and scoring easier while developing flavor.
- Preheat thoroughly: A very hot Dutch oven helps produce excellent oven spring.
- Cool before slicing: Give the loaf at least 1–2 hours to cool for the best crumb.
How to Know When the Dough Is Ready
During bulk fermentation, the dough should become noticeably smoother and puffier. You may see bubbles along the sides or underneath the surface.
When gently shaken, a well-fermented dough should jiggle slightly. If it remains very dense and tight, it may need more fermentation time.
If the dough has become extremely loose, collapsed, or developed a strong alcoholic smell, it may have fermented too long.
Temperature has a major effect on fermentation. A warm kitchen can shorten the fermentation time considerably, while a cool kitchen may require additional hours.
Storage
Store the cooled loaf at room temperature in a bread bag, paper bag, or loosely covered container for up to 3 days.
For longer storage, slice the bread and freeze it in an airtight freezer-safe bag for up to 3 months.
Slices can be toasted directly from frozen.
Avoid storing sourdough bread in the refrigerator because refrigeration can cause the bread to become stale more quickly.
Serving Ideas
Fresh sourdough is delicious simply sliced and spread with butter. It also works beautifully for:
- Avocado toast
- Grilled cheese sandwiches
- Breakfast toast with eggs
- Bruschetta
- Sandwiches
- French toast
- Toast with jam or honey
- Soup and stew accompaniment
Quick Recipe Summary
Mix: Flour + water + starter → rest 30 minutes
Add: Salt
Bulk ferment: 4–6 hours with stretch-and-folds
Shape: Form one round loaf
Cold proof: 8–12 hours
Bake: 20 minutes covered at 240°C, then 20–25 minutes uncovered at 220°C
Cool: 1–2 hours before slicing
Best result: A deeply golden, crisp crust with a light, chewy crumb and naturally developed sourdough flavor.
